This is not a tiny project. While this is the main Readme, there are many other files you might want to consult. Here are some points of interest:
-* The Readme for your own keyboard: This is found under `keyboards/<your keyboards's name>/`. So for the ErgoDox EZ, it's [here](keyboard/ergodox_ez/); for the Atomic, it's [here](keyboard/atomic/) and so on.
+* The Readme for your own keyboard: This is found under `keyboards/<your keyboards's name>/`. So for the ErgoDox EZ, it's [here](keyboards/ergodox_ez/); for the Atomic, it's [here](keyboards/atomic/) and so on.
* The [build guide](doc/BUILD_GUIDE.md), also mentioned in the next section. This is how you put your development environment together so you can compile the firmware.
* The list of possible keycodes you can use in your keymap is actually spread out in a few different places:
* [tmk_core/common/keycode.h](tmk_core/common/keycode.h) - the base TMK keycodes. This is the actual source file.
## Getting started
-* [BUILD_GUIDE.md](doc/BUILD_GUIDE.md) contains instructions to set up a build environment, build the firmware, and deploy it to a keyboard. Once your build environment has been set up, all `make` commands to actually build the firmware must be run from a folder in `keyboard/`.
-* If you're looking to customize a keyboard that currently runs QMK or TMK, find your keyboard's directory under `keyboard/` and run the make commands from there.
-* If you're looking to apply this firmware to an entirely new hardware project (a new kind of keyboard), you can create your own Quantum-based project by using `util/new_project.sh <project_name>`, which will create `/keyboard/<project_name>` with all the necessary components for a Quantum project.
+* [BUILD_GUIDE.md](doc/BUILD_GUIDE.md) contains instructions to set up a build environment, build the firmware, and deploy it to a keyboard. Once your build environment has been set up, all `make` commands to actually build the firmware must be run from a folder in `keyboards/`.
+* If you're looking to customize a keyboard that currently runs QMK or TMK, find your keyboard's directory under `keyboards/` and run the make commands from there.
+* If you're looking to apply this firmware to an entirely new hardware project (a new kind of keyboard), you can create your own Quantum-based project by using `util/new_project.sh <project_name>`, which will create `/keyboards/<project_name>` with all the necessary components for a Quantum project.
### Makefile Options
#define EXT_PLV M(13)
```
-As was done on the [Planck default keymap](/keyboard/planck/keymaps/default/keymap.c#L33-L40)
+As was done on the [Planck default keymap](/keyboards/planck/keymaps/default/keymap.c#L33-L40)
#### Timer functionality
Your keyboard can make sounds! If you've got a Planck, Preonic, or basically any keyboard that allows access to the C6 port, you can hook up a simple speaker and have it beep. You can use those beeps to indicate layer transitions, modifiers, special keys, or just to play some funky 8bit tunes.
-The audio code lives in [quantum/audio/audio.h](/quantum/audio/audio.h) and in the other files in the audio directory. It's enabled by default on the Planck [stock keymap](/keyboard/planck/keymaps/default/keymap.c). Here are the important bits:
+The audio code lives in [quantum/audio/audio.h](/quantum/audio/audio.h) and in the other files in the audio directory. It's enabled by default on the Planck [stock keymap](/keyboards/planck/keymaps/default/keymap.c). Here are the important bits:
```
#include "audio.h"
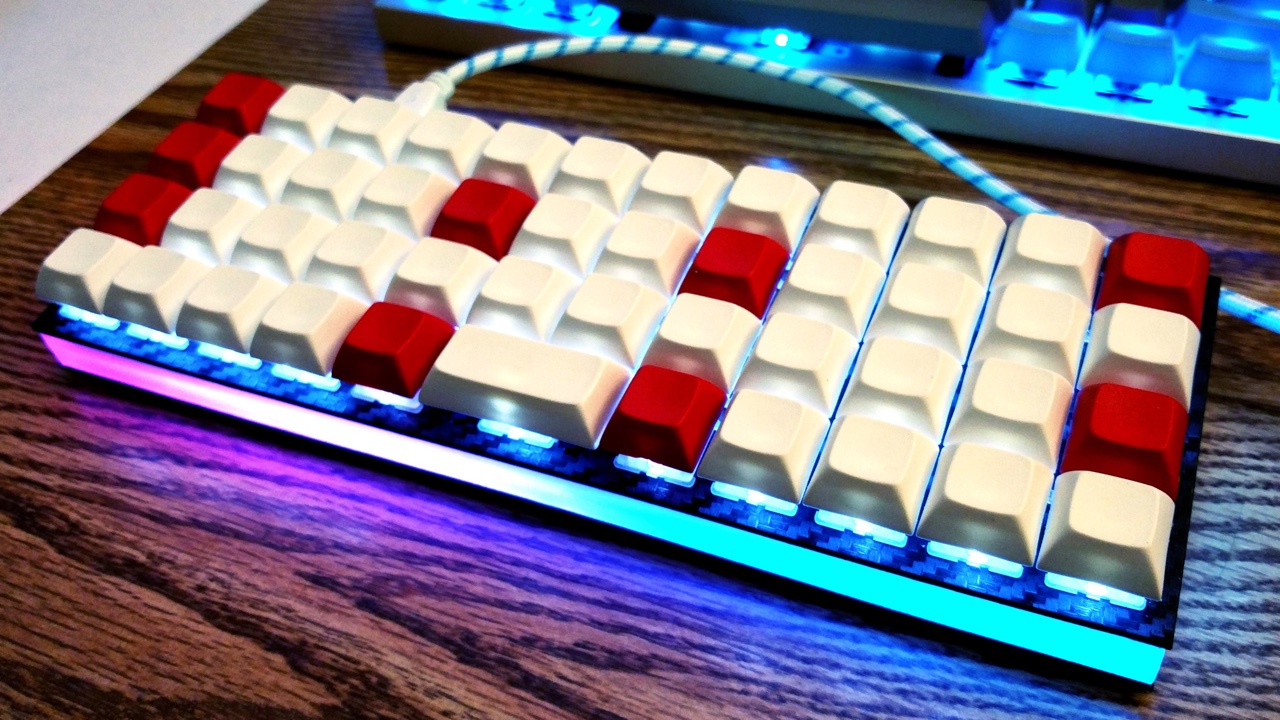
## RGB Under Glow Mod
-
+
Here is a quick demo on Youtube (with NPKC KC60) (https://www.youtube.com/watch?v=VKrpPAHlisY).
#define ws2812_DDRREG DDRB
#define ws2812_pin PB3
-The firmware supports 5 different light effects, and the color (hue, saturation, brightness) can be customized in most effects. To control the underglow, you need to modify your keymap file to assign those functions to some keys/key combinations. For details, please check this keymap. `keyboard/planck/keymaps/yang/keymap.c`
+The firmware supports 5 different light effects, and the color (hue, saturation, brightness) can be customized in most effects. To control the underglow, you need to modify your keymap file to assign those functions to some keys/key combinations. For details, please check this keymap. `keyboards/planck/keymaps/yang/keymap.c`
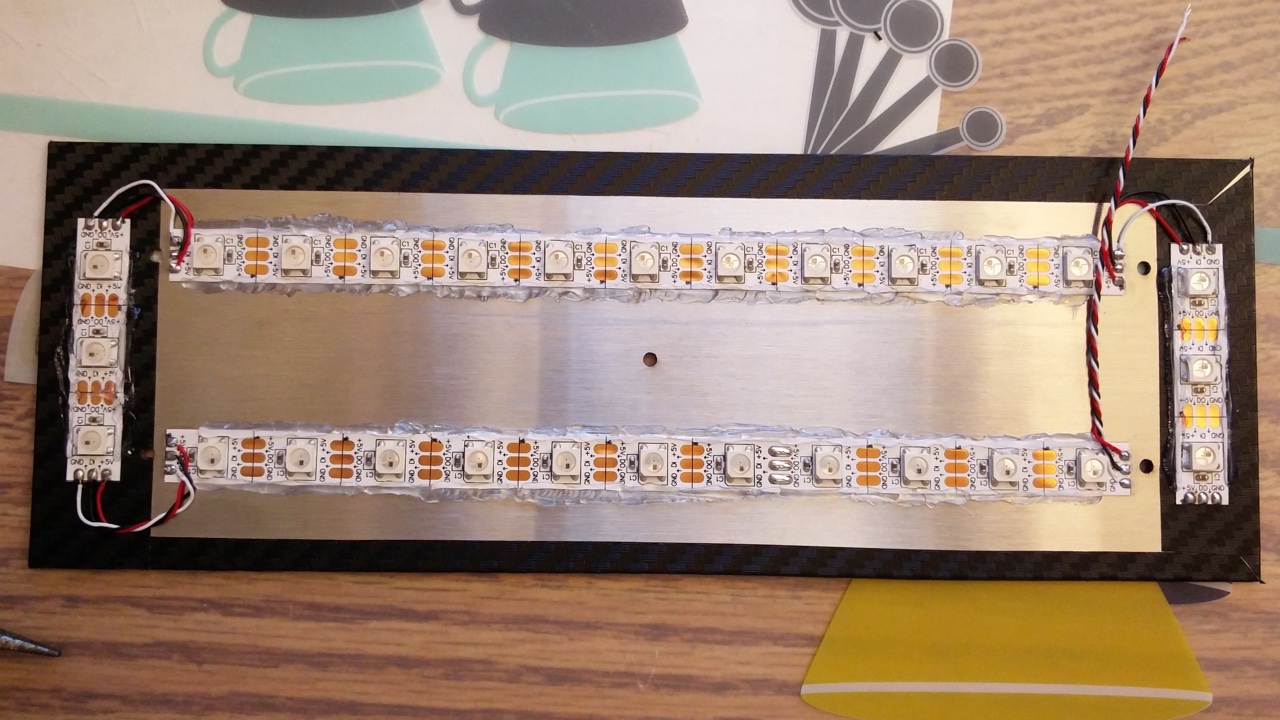
### WS2812 Wiring
-
+
Please note the USB port can only supply a limited amount of power to the keyboard (500mA by standard, however, modern computer and most usb hubs can provide 700+mA.). According to the data of NeoPixel from Adafruit, 30 WS2812 LEDs require a 5V 1A power supply, LEDs used in this mod should not more than 20.