## Getting started
-* **If you're looking to customize a keyboard that currently runs QMK or TMK** , find your keyboard's directory under `/keyboard/` and read the README file. This will get you all set up.
-* Read the [QUICK_START.md](QUICK_START.md) if you want to hit the ground running with minimal fuss or you aren't a technical person and you just want to build the firmware with the least amount of hassle possible.
+* [BUILD_GUIDE.md](BUILD_GUIDE.md) contains instructions to set up a build environment, build the firmware, and deploy it to a keyboard. Once your build environment has been set up, all `make` commands to actually build the firmware must be run from a folder in `keyboard/`.
+* If you're looking to customize a keyboard that currently runs QMK or TMK, find your keyboard's directory under `keyboard/` and run the make commands from there.
* If you're looking to apply this firmware to an entirely new hardware project (a new kind of keyboard), you can create your own Quantum-based project by using `./new_project.sh <project_name>`, which will create `/keyboard/<project_name>` with all the necessary components for a Quantum project.
You have access to a bunch of goodies! Check out the Makefile to enable/disable some of the features. Uncomment the `#` to enable them. Setting them to `no` does nothing and will only confuse future you.
So above you can see the stroke interval changed to 255ms between each keystroke, then a bunch of keys being typed, waits a while, then the macro ends.
-Note: Using macros to have your keyboard send passwords for you is a bad idea.
+Note: Using macros to have your keyboard send passwords for you is possible, but a bad idea.
-### Additional keycode aliases for software-implemented layouts (Colemak, Dvorak, etc)
+### Advanced macro functions
+
+To get more control over the keys/actions your keyboard takes, the following functions are available to you in the `action_get_macro` function block:
+
+* `record->event.pressed`
+
+This is a boolean value that can be tested to see if the switch is being pressed or released. An example of this is
+
+```c
+if (record->event.pressed) {
+ // on keydown
+} else {
+ // on keyup
+}
+```
+
+* `register_code(<kc>);`
+
+This sends the `<kc>` keydown event to the computer. Some examples would be `KC_ESC`, `KC_C`, `KC_4`, and even modifiers such as `KC_LSFT` and `KC_LGUI`.
+
+* `unregister_code(<kc>);`
+
+Parallel to `register_code` function, this sends the `<kc>` keyup event to the computer. If you don't use this, the key will be held down until it's sent.
+
+* `layer_on(<n>);`
+
+This will turn on the layer `<n>` - the higher layer number will always take priority. Make sure you have `KC_TRNS` for the key you're pressing on the layer you're switching to, or you'll get stick there unless you have another plan.
+
+* `layer_off(<n>);`
+
+This will turn off the layer `<n>`.
+
+* `clear_keyboard();`
+
+This will clear all mods and keys currently pressed.
+
+* `clear_mods();`
+
+This will clear all mods currently pressed.
+
+* `clear_keyboard_but_mods();`
+
+This will clear all keys besides the mods currently pressed.
+
+#### Timer functionality
+
+It's possible to start timers and read values for time-specific events - here's an example:
+
+```c
+static uint16_t key_timer;
+key_timer = timer_read();
+if (timer_elapsed(key_timer) < 100) {
+ // do something if less than 100ms have passed
+} else {
+ // do something if 100ms or more have passed
+}
+```
+
+It's best to declare the `static uint16_t key_timer;` outside of the macro block (top of file, etc).
+
+## Additional keycode aliases for software-implemented layouts (Colemak, Dvorak, etc)
Everything is assuming you're in Qwerty (in software) by default, but there is built-in support for using a Colemak or Dvorak layout by including this at the top of your keymap:
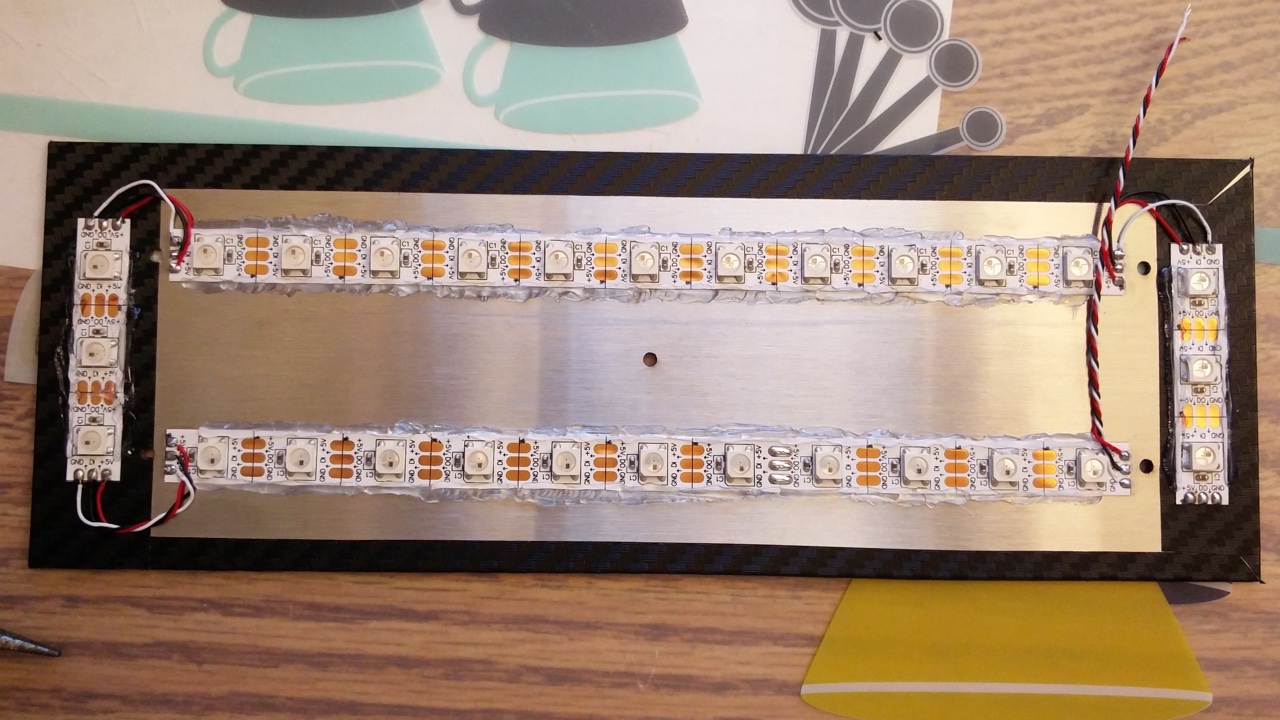
Please note the USB port can only supply a limited amount of power to the keyboard (500mA by standard, however, modern computer and most usb hubs can provide 700+mA.). According to the data of NeoPixel from Adafruit, 30 WS2812 LEDs require a 5V 1A power supply, LEDs used in this mod should not more than 20.
+
+## Safety Considerations
+
+You probably don't want to "brick" your keyboard, making it impossible
+to rewrite firmware onto it. Here are some of the parameters to show
+what things are (and likely aren't) too risky.
+
+- If a keyboard map does not include RESET, then, to get into DFU
+ mode, you will need to press the reset button on the PCB, which
+ requires unscrewing some bits.
+- Messing with tmk_core / common files might make the keyboard
+ inoperable
+- Too large a .hex file is trouble; `make dfu` will erase the block,
+ test the size (oops, wrong order!), which errors out, failing to
+ flash the keyboard
+- DFU tools do /not/ allow you to write into the bootloader (unless
+ you throw in extra fruitsalad of options), so there is little risk
+ there.
+- EEPROM has around a 100000 write cycle. You shouldn't rewrite the
+ firmware repeatedly and continually; that'll burn the EEPROM
+ eventually.
+
\ No newline at end of file